
If your preschooler is a race car fanatic like my little one, he will love having his very own race car room, complete with a race car bed, race track, and toolbox dresser!
Step 1: Paint the Walls
First, paint the top of the wall Celestial Blue and the bottom of the wall white. You can leave the edge rough where the blue and white meet since you will be hanging a wall border over this part later.
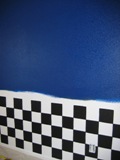
Step 2: Create the “Checkered Flag”
If you have smooth walls, it’s best to tape out the boxes so you get smooth, clean lines. However, if you have textured walls, as we do, taping will be futile. It’s best just to get yourself a sponge brush and paint the squares freehand. Of course, you will want to measure and draw penciled lines on the walls so that you will make each square the same size and get as straight an edge as possible. If you do not use tape, the best way to get a smooth edge to your boxes is to paint the inside of the box first, then push the paint to the edges. This will roll the paint and leave a fairly straight line. Remember, you can always go back and touch it up – and believe me, you will be going back to touch it up!
Step 3: Paint the Race Track
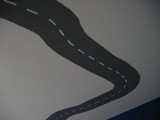
If the ceiling isn’t already white, you will want to paint it white next. Once it is dry, freehand a race track around the perimeter of the room using gray paint. This is best done with a wide sponge brush. Paint out a rough track first, then go back and “fill it in”. I recommend that you leave about 1 1/2 to 2 feet of space between the walls and your race track so that you don’t have such a big white space in the center of the race track.
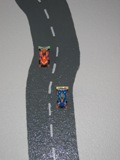
Once the gray paint dries, paint white dashed lines down the center of the track. This will make it look more like a race track, giving the race cars room to pass each other.

Step 4: Hang the Wall Border
Finish *all* of your painting before hanging the wall border so that you won’t have to worry about the wall border getting paint on it. Be sure to read the instructions for hanging the wall border *before* you begin. You will need the help of a second person for this to do it right and without too much frustration. You may need to go back with a small paintbrush and glue to get any edges to stick that didn’t stick.
Step 5: Glue the Race Cars in Place
Once the race track paint is completely dry, use a hot glue gun to glue the wheels of small race cars to the race track. Six race cars is a good number. Space them out around the track, but you should have at least two that seem to be “racing” each other to the finish. I found our race cars at a party store. They were party favors, costing less than $1 each!
Step 6: The Checkered Flag Lamp
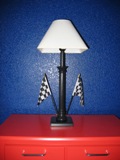
Find a lamp with a wooden base, either one that you already own or you can buy one at Target or a garage sale. Sand the base and drill two holes at an angle on either side of the base. The holes will be the same size as the two checkered flags you picked up from a party store. Spray paint the lamp base black. When it’s dry, replace the lampshade and insert the checkered flags on either side of the lamp base.
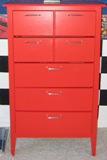
Step 7: The Tool Box Dresser
Remove the drawer pulls from the dresser and pull each drawer out of the dresser. Sand the entire surface of the dresser and drawer fronts. Paint the dresser and drawer fronts a bright, glossy red. Once dry, screw in silver drawer pulls that resemble metal handles you would see on a toolbox.
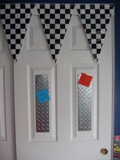
Step 8: Now the Best Part – Decorate the Room!
For my son’s race car room, I got really creative. I found a checkered flag banner at a party store for under $6. I hung it above the closet and windows as a valance. On the closet doors, I hung foot treads that are for the steps on big trucks. First, we spray painted them silver, then we removed the backing and stuck them onto paper. We did this because the glue on the backs of the treads is intended to stick *forever* – not easily removable, by all means. Then, we hung them with double-sided Post-it squares onto the outset areas of the closet doors. The treads will double as a bulletin board – just add pushpins and little notes that read, “Call Pit Crew”, “Change Oil” and “Overhaul Engine”. (Note: Be sure to hang them high enough so that they are out of your preschoolers to reach.)
Step 9: Hang Shelves
I found some unfinished shelves at a craft store. I painted them white and then lined the edges of the shelves with race car stickers to liven them up. I also found a cute “Nascar Parking Only” sign and hung that on the wall.
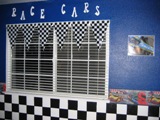
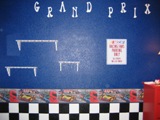
Step 10: Hang Racing Words
The craft store had unfinished letters that were about 4-6″ tall. I sanded and painted them white. I hung a word on each wall – “Grand Prix”, “Race Cars”, “Winner”, and “Pit Crew”. I staggered the letters to add interest.
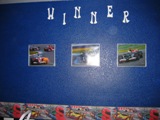
Step 11: Hang Race Car Photos
I found a race car calendar with wonderful photos of race cars in it. I cut them out and placed them in frames. Since the frames were black, I spray painted them with silver paint first. I hung several of the framed photos around the room.
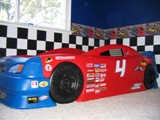
Step 12: Assemble the Race Car Bed
We ordered the “Stock Car Bed” manufactured by Step 2. This bed was so incredibly easy to put together. It took about 5 minutes to assemble, but about 20 minutes to put the decals on. The Step 2 Stock Car bed accommodates a crib mattress or a twin mattress. If you use a crib mattress, your preschooler will be able to play with the matchbox race track at the foot of the bed. One of the many great features of this bed is its high sides, so you won’t have to worry about your preschooler falling out onto the floor.
I covered the mattress with race car bedding. One drawback is the thread count will be low, so it may be a little scratchy. Just wash it with fabric softener before putting it on the bed.